Wicked Stone Home - Halloween Home

Most of the pictures on this web page are thumbnails. Each thumbnail is ¼ size and ¼ quality of the full image, approximately 3K bytes. Each thumbnail is a hyperlink to a full image that is approximately 42K - 103K bytes.
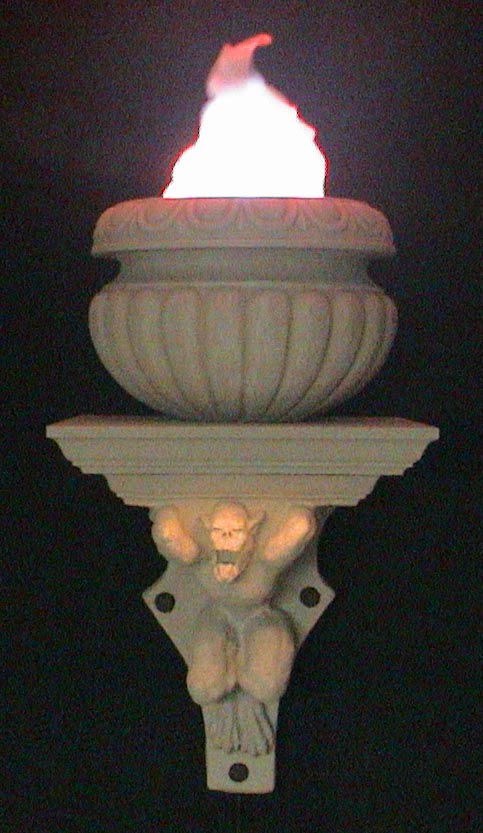
My Demon Wall Sconce was built around Steve Hickman's Terror Syndicate GraveStalkers Wall Demon. Steve's Wall Demon wasn't large enough to hold the urn that was to contain the silk flame. I opted to build a shelf to sit on top of the Wall Demon. I was concerned that the rigid urethane foam Wall Demon wouldn't support the weight of the silk flame, the urn and the shelf so I backed the Wall Demon with 3/8" plywood and used angle brackets to support the shelf.
Materials
|
(1) Antari Diablo
Flame Machine |
$65 |
|
(1) Terror Syndicate GraveStalker's Demon Wall Sconce |
$40 |
|
(1) 18" Plastic Urn |
$30 |
|
(4) 2" - 1 1/8"
Poplar Dowels |
|
|
(2) 9 1/4"
x 7 1/2" - 3/4" Pine
Boards |
|
|
(1) 1 7/8"
- 4" Schedule 40 PVC Pipe |
|
|
4" x 2 1/8"
Handy Box (Single Outlet), Duplex Cover and White Duplex Receptacle |
|
|
3/8"
Romex NM Connector |
|
|
(2) #10 x 3/4"
Round Head Phillips Wood Screws |
|
|
(1) 3-Wire Electrical Cord with
Grounded Plug |
|
|
3/4"
and 1 1/2" Brads |
|
|
(1) 14 1/4"
x 14 3/8" - 1 1/2" Dow
Blue Styrofoam Insulation |
|
|
(1) 18" x 24" - 3/8"
Plywood (Backing) |
(see Shelf Top) |
|
(8) 1 1/4"
- 5/16"/18 Flat Head Phillips Machine Screws
(Bolts), Lockwashers and Nuts |
|
|
(1) 49 1/2"
(16" + 16" + 17 1/2") - 2 3/4"
Pine Crown Molding |
5' x $1.26 = $6.30 |
|
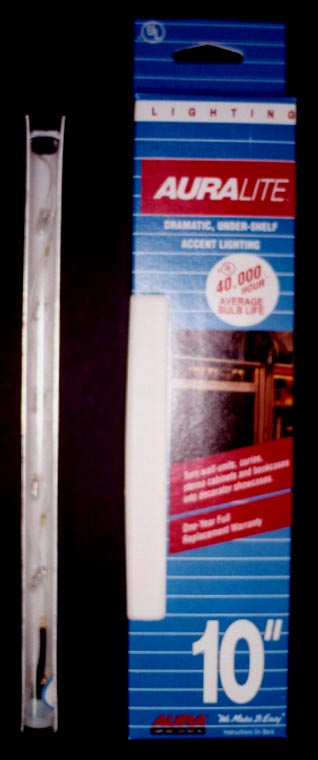
(1) 10" Black Auralite (48102) |
$15.97 |
|
(1) 14 1/4"
x 4 3/4" - 3/8" Plywood
(Shelf Underside) |
(see Shelf Top) |
|
(1) 16 3/4"
x 15 3/4" - 3/8"
Plywood (Shelf Top) |
2' x 4' - 3/8"
Plywood = $6.37 |
|
(2) 8" x 1 1/8"
Corner Brackets |
2 x $4.63 = $9.26 |
|
(2) Liquid Nails |
2 x $0.98 = $1.96 |
|
(1) 6" (2" + 2" +
2") - 1" Poplar Dowel |
|
|
Five-Minute Epoxy Glue |
|
|
Dark Stain |
|
|
409 Cleaner |
|
|
Wood Glue |
|
|
Wood Filler |
|
|
Gray Spray Primer |
$1.99 |
|
Rust-Oleum American Accents Stone
Creations Faux Stone Spray Paint |
2 x $6.99 = $13.98 |
Tools
|
5/8",
1" and 1 1/8" Spade Bits |
|
1/8", 3/16",
5/16", 3/8" and 1/2"
Drill Bits |
|
4" Keyhole Saw |
|
Drill |
|
Brad Nailer |
|
Table or Compound Miter Saw |
|
2" x 2" Polishing Drum
and 60 Grit Sandpaper Band |
|
Back Saw |
I used a back saw to cut the pedestal from the urn. This left a 5 3/4" hole in the bottom of the urn. These pictures show the urn with and without the pedestal.
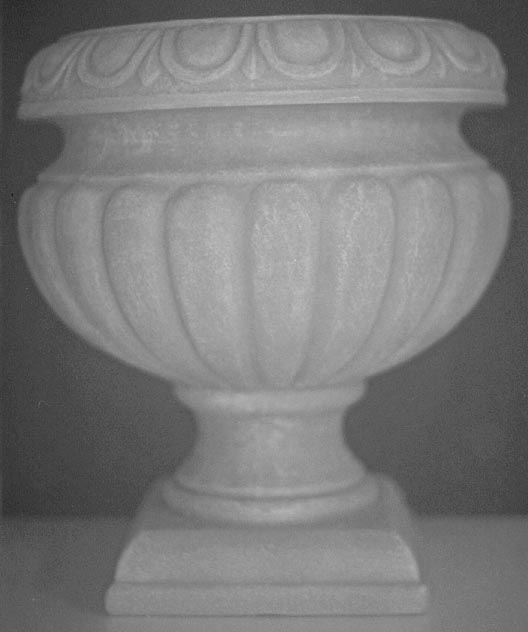 -
-
Next I built a platform to support the silk flame within the urn such that the top of the silk flame chassis was flush with the top of the urn. The platform was formed from two 3/4" pine boards separated by 1 1/8" poplar dowels.
The two 9 1/4" x 7 1/2" - 3/4" pine boards are the same size as the silk flame chassis. One of the two pine boards will sit on a length of 4" schedule 40 PVC pipe. The PVC pipe is cut such that the pine board (when positioned on top of the pipe) rests just above the sides of the urn. With my urn, I used a 1 7/8" length of 4" schedule 40 PVC pipe.
I placed the two pine boards on top of the 1 7/8" length of PVC pipe and placed the silk flame chassis on top of the pine boards. I measured the distance from the top of the chassis to the top of the urn and added 1 1/2" (the thickness of the pine boards times two) to this distance to determine the length of the 1 1/8" poplar dowels. With my urn, I used four 2" lengths of 1 1/8" poplar dowels.
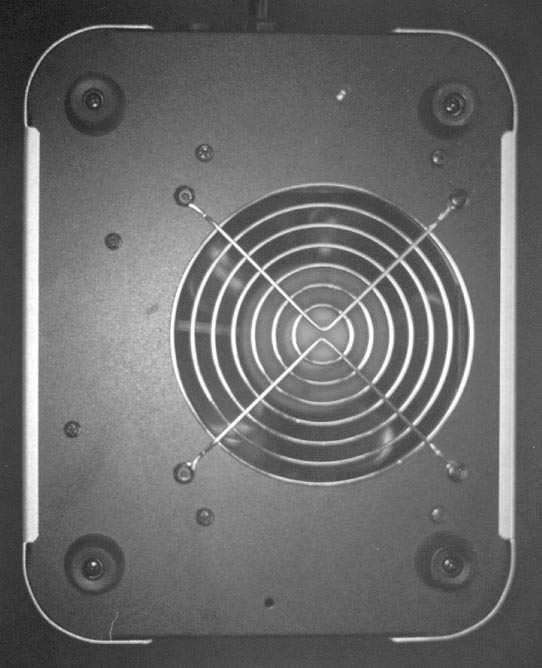
I used a 1 1/8" spade bit to drill four holes in each of the two pine boards corresponding to the four rubber feet of the chassis. I used a 4" keyhole saw to cut a 4" hole in the top pine board corresponding to the silk flame fan. This picture shows the four rubber feet and the orientation of the fan.
The four 2" lengths of 1 1/8" poplar dowels are used to separate the two pine boards. The dowels are secured to the pine boards using wood glue and 1 1/2" brads. The pine board "sandwich" sits on top of the 1 7/8" length of PVC pipe. I used five-minute epoxy glue to secure the PVC pipe in the center of the bottom pine board.
I drilled two holes (large enough to accept a #10 wood screw) 3/8" from the top, along a 4" side of the handy box. The top of the handy box is centered along the 9 1/4" side of the top pine board. I marked the holes on the side of the top pine board. I drilled the holes using a 1/8" drill bit. I secured the handy box to the sandwich using a pair of #10 x 3/4" round head Phillips wood screws. These pictures show the completed sandwich platform from the top, side and bottom (left to right).
 -
-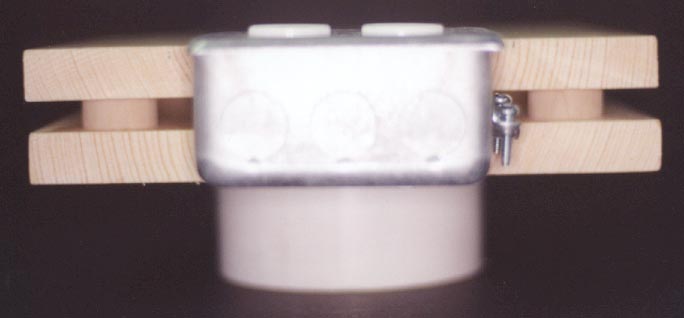 -
-
This picture shows the completed assembly positioned inside of the urn.
Next I built the shelf. The depth of the shelf (16") corresponds to the diameter of the urn.
I beveled the front and side edges of the shelf top at a 45° angle. I mitered the crown molding in order to form a three-sided frame. The exposed ends of the frame were cut square. I applied wood glue to the ends of the crown molding and tacked the crown molding together using brads. I applied wood glue to the beveled edges of the shelf top, positioned the assembled crown molding around the shelf top and tacked the crown molding to the shelf top using brads.
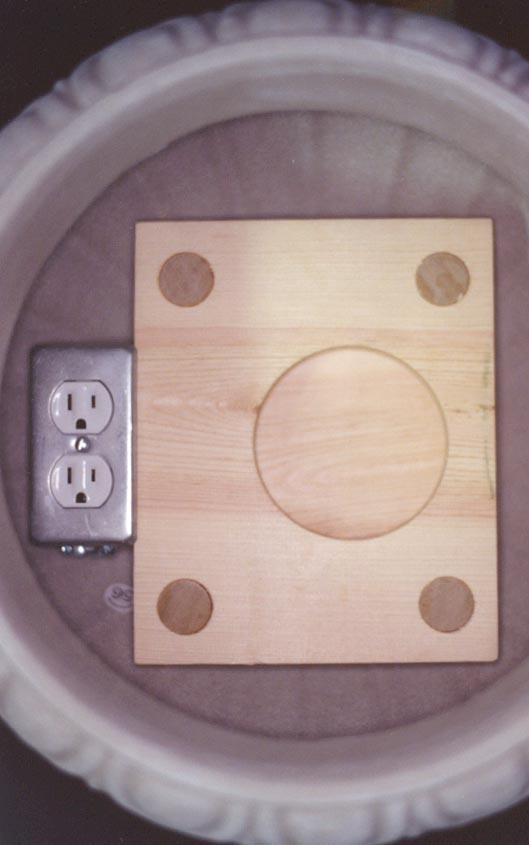
I positioned and marked the outer diameter of the PVC ring in the center of the shelf top. I positioned and marked the inner diameter of the urn in the center of the shelf top. I drilled a 1/2" hole in the shelf top in between the outer diameter of the PVC ring and the inner diameter of the urn towards the back of the shelf top. This hole will be used to pass the electrical cords.
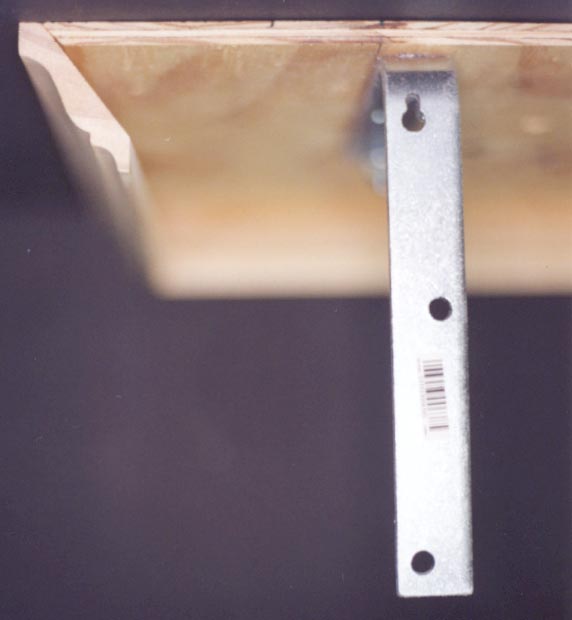
I positioned the corner brackets 5 1/4" from the sides of the shelf and flush with the back of the shelf. I marked the holes in the corner brackets on the top of the shelf. I drilled and countersunk holes to accept the 5/16" machine screws that will secure the shelf top to the corner brackets.
The hole in the corner brackets closest to the shelf top will be used to hang the completed sconce. I drilled a small hole just above this hole in order to form a keyhole.
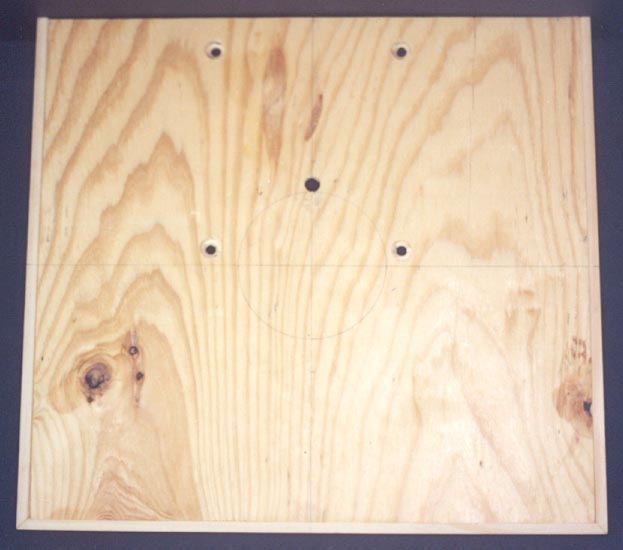
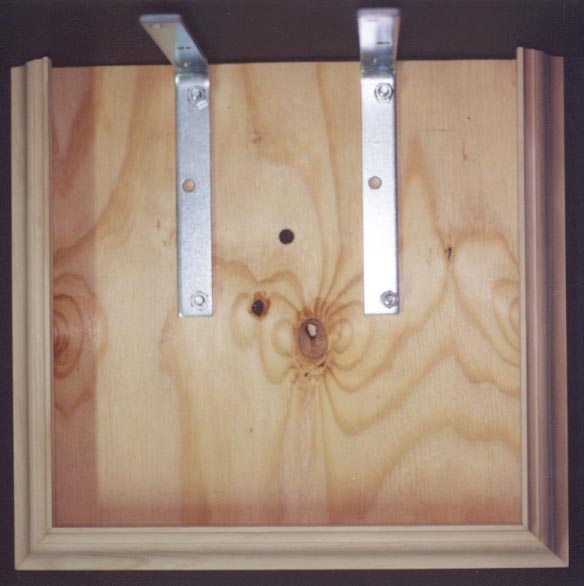
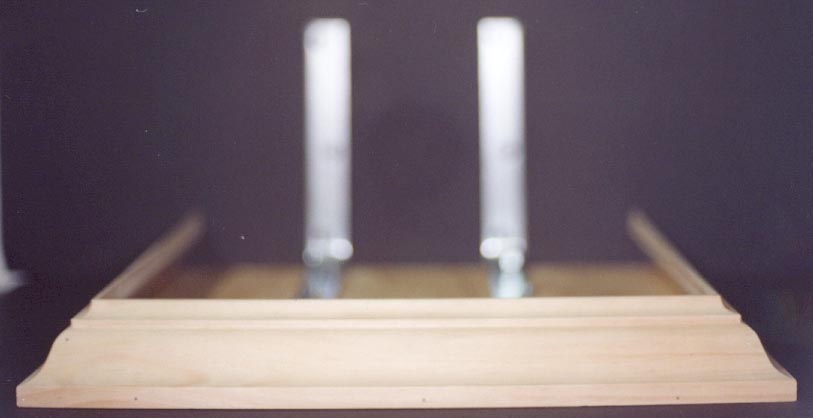
These pictures show the assembled shelf from the top, bottom, front and back (left to right).
 -
- -
- -
-
I positioned the Styrofoam under the shelf. I drilled a 1/2" hole in the Styrofoam corresponding to the 1/2" hole in the shelf top. I used a Dremel to route the face and side of the Styrofoam corresponding to the angle brackets (with the nuts and bolts) such that the Styrofoam would lay flush against the underside of the shelf top. This picture shows the Auralite.
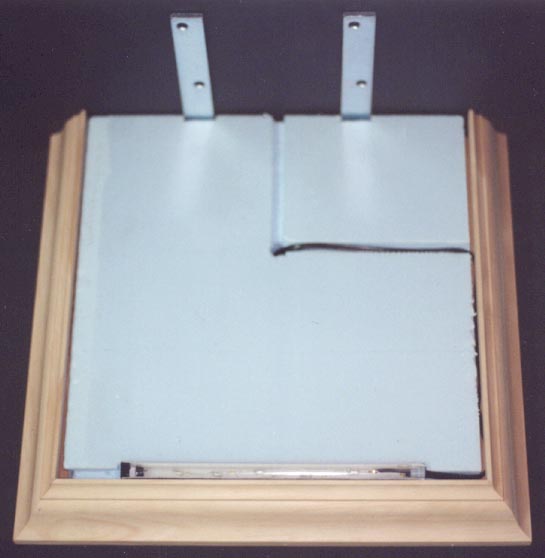
I centered the Auralite along the front of the crown molding. I cut a notch in the Styrofoam such that the Auralite would sit flush with the top of the crown molding. I cut a notch in the Styrofoam to allow the Auralite power cord to extend to the crown molding. I used a Dremel to route a channel to allow the Auralite power cord to extend from the crown molding to the hole in the center of the shelf top (and Styrofoam). I used a Dremel to route a channel to allow the 3-wire electrical cord to extend from the back of the shelf to the hole in the center of the shelf top (and Styrofoam). This picture shows the Styrofoam positioned under the shelf. You can see that the Auralite is flush with the top of the crown molding and the power cord extends along the side of the crown molding, across the notch in the Styrofoam to a hole in the shelf top.
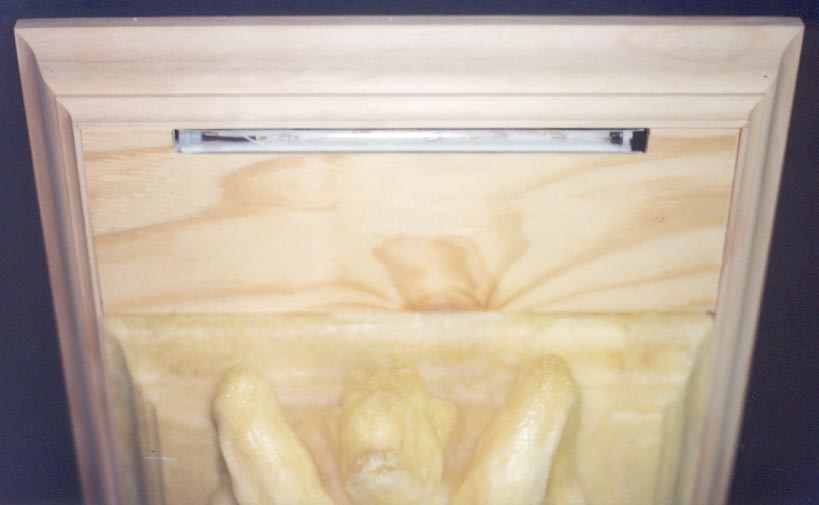
The Wall Demon should fit snugly in between the sides of the crown molding, flush with the back of the shelf. I cut a notch in the 14 1/4" x 4 3/4" - 3/8" plywood shelf underside to accept the Auralite. The shelf underside should fit in between the crown molding and the Wall Demon and should be flush with the top of the crown molding. This picture shows the shelf underside positioned in between the crown molding and the Wall Demon, flush with the crown molding.
I positioned the 3/8" plywood backing against the crown molding, shelf top and corner brackets. I traced the profile of the crown molding and the Wall Demon on the backing. I marked the holes in the corner brackets on the backing. I drilled and countersunk holes to accept the 5/16" machine screws that will secure the backing to the corner brackets.
I traced the profile of the corner brackets on the Wall Demon. I used a Dremel to remove the foam such that the Wall Demon would lay flush with the back of the shelf. This picture shows the cut-outs in the back of the Wall Demon to accept the corner brackets (with nuts and bolts) and the channel down the center of the Wall Demon to accept the 3-wire electrical cord.
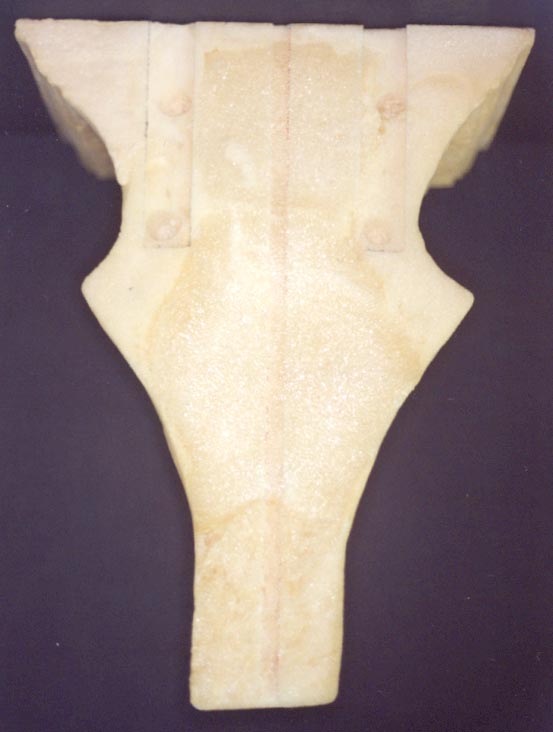
There were three "buttons" on the face of the Wall Demon. I wasn't exactly sure what these buttons were supposed to be so I drilled them out using a 1" spade bit. I cut short (2") lengths of 1" poplar dowel such that the dowels slightly protruded from the face of the Wall Demon. I distressed the dowels using an Exacto knife, file and hammer and stained the dowels with a dark wood stain. The wood dowels will be epoxied into the Wall Demon after it has been painted.
I cleaned the Wall Demon with 409 spray cleaner.
I used Liquid Nails to secure the Styrofoam to the underside of the shelf top. The Auralite electrical cord should sit in the channel in the top of the Styrofoam and pass through the hole in the center of the Styrofoam and the shelf top.
I used Liquid Nails to secure the Wall Demon to the backing. The 3-wire electrical cord should sit in the channel in the back of the Wall Demon and the channel in the top of the Styrofoam. The 3-wire electrical cord should pass through the hole in the center of the Styrofoam and the shelf top.
You will want to protect the Auralite and 3-wire electrical cords from the spray primer and faux stone paint.
I used wood filler to blend the plywood backing into the Wall Demon. I used a 2" x 2" polishing drum with a 60 grit sandpaper band in a drill to sand the wood filler flush with the Wall Demon.
My Wall Demon had rather "large pores". I used my finger to fill the pores with Elmer's spackling compound. The faux stone spray paint is relatively course and will cover most of the smaller pores, but filling the larger pores with spackling compound will help to ensure a solid finish.
I used a spray primer to prime the Wall Demon, including the sides of the plywood backing and shelf top. I allowed the spray primer to dry thoroughly before I applied the faux stone paint. I applied the faux stone paint over the primer. I was more comfortable using two cans of faux stone spray paint, although I probably could have got by with one.
If you can no longer see the marks corresponding to the PVC ring and the urn on the top of the shelf, reposition and remark the PVC ring and the urn.
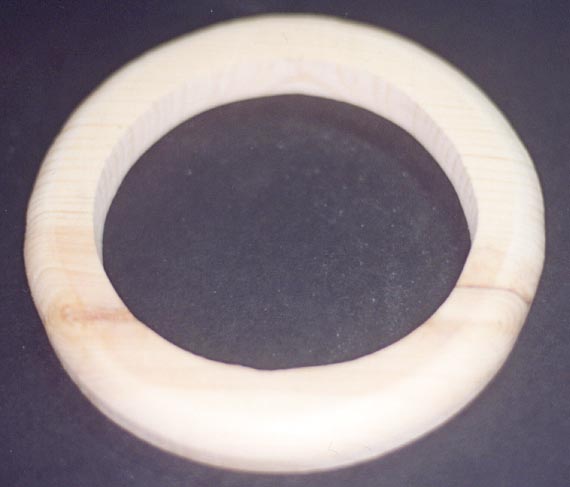
I secured the urn and the sandwich platform to the top of the shelf using a wooden ring. The inner diameter of the wooden ring was equal to the outside diameter of the 4" PVC ring. The outer diameter of the wooden ring was 1" wider than the diameter of the hole in the bottom of the urn. The outer bottom edge of the wooden ring was rounded using a 3/4" router round-over bit. I drilled and countersunk four holes equal distance around the circumference of the wooden ring in order to accept #12 wood screws. I drilled a 1/2" hole in the wooden ring corresponding to the 1/2" hole in the shelf top. This is a picture of the wood ring before the holes were drilled.
Tip: Position the silk flame chassis such that the orange bulbs point away from the wall. The silk will cast a shadow on the wall if the bulbs point toward the wall. Flames typically don't cast shadows! This means that you must position the sandwich platform accordingly.
I generously applied epoxy to the bottom of the urn. I fed the cords through the hole in the bottom of the urn and positioned the urn in the center of the shelf top corresponding to the mark. I generously applied epoxy to the bottom of the wooden ring. I fed the cords through the 1/2" hole in the wooden ring. I centered the wooden ring in the bottom of the urn and secured the ring (and the urn) to the shelf top using four wood screws. I generously applied epoxy to the inside of the PVC ring and slipped the PVC ring into the wooden ring.
The 3-wire electrical cord passes through a 3/8" Romex NM connector in the end of the handy box and is wired to the receptacle. The receptacle is screwed to the handy box and the cover is screwed to the receptacle. I connected the plug and switch to the Auralite electrical cord and plugged the Auralite into the receptacle. I positioned the silk flame on the sandwich platform and plugged the silk flame into the receptacle.
Summary
I was very happy with the finished product(s). I actually built two. At over $200 each, they weren't cheap, but I think that they are very effective.