Wicked Stone Home - Halloween Home

circa 2002
Most of
the pictures on this web page are thumbnails. Each thumbnail is ¼ size and ¼
quality of the full image, approximately 3K - 10K bytes. Each thumbnail is a
hyperlink to a full image that is approximately 30K - 100K bytes.
Introduction
The Erector was reverse-engineered from photographs taken of the Scarefactory's Skelerector at the Transworld's 18th National Halloween, Costume and Party Show, March 8 - 12, 2002 in Rosemont, Illinois,


the 2nd Annual Ohio Haunted Conference, June 22, 2002 in Columbus, Ohio,
and the Transworld's 19th National Halloween, Costume and Party Show, March 7 - 11, 2003 in Rosemont, Illinois,
Three things attracted me to the Scarefactory's Skelerector.
First, I was intrigued by the Scarefactory's use of springs. The Scarefactory offers a manually operated version of the Skelerector that relies solely on the springs in order to erect the prop. A fully automated version utilizes a double-acting cylinder (with one port simply used as an exhaust) in order to RETRACT the prop. The automated version still relies solely on the springs in order to erect the prop.
The second thing that attracted me to the Scarefactory's Skelerector was its complex construction. It is actually just a four-bar linkage, however, it's what I refer to as an EXTREME four-bar linkage.
The third thing that attracted me to the Scarefactory's Skelerector was its welded construction. This was my first attempt at welding. With the complex construction, this probably wasn't the best project for a total newbie.
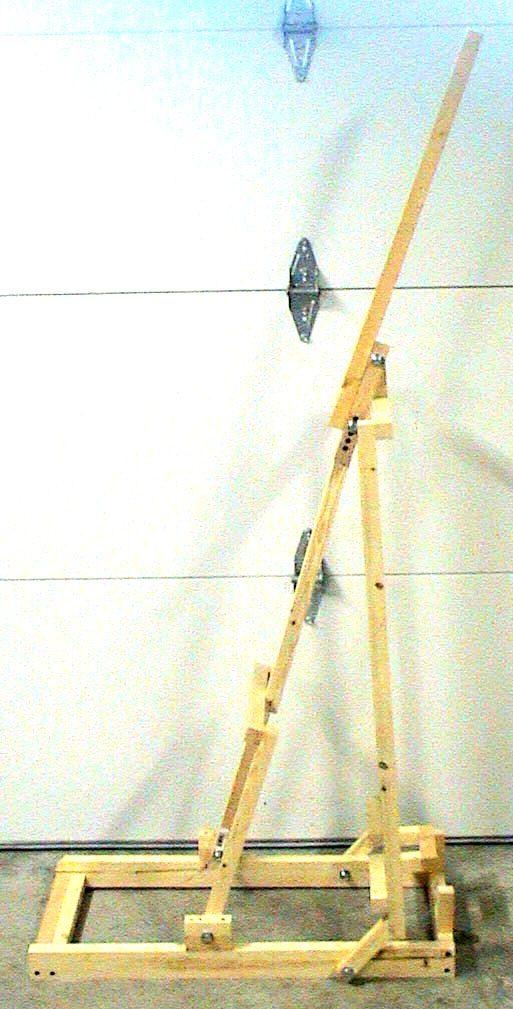
Plans
These are the plans on which I based the construction. Please note, there are a few inaccuracies in these plans which I will correct once the project is complete.
Prototype
I first prototyped the project using 1" x 1" and 1" x 2" pine. The length of the various members that comprise the four-bar linkage is critical. If you click on the thumbnail photographs, you will see from the full-size images that I drilled holes on 1/2" centers in order to experiment with various combinations. At one point, I cut a 1/4" from the end of one of the bars, effectively creating holes on 1/4" centers. A 1/4" difference in the length of the bars made a considerable difference.

Construction
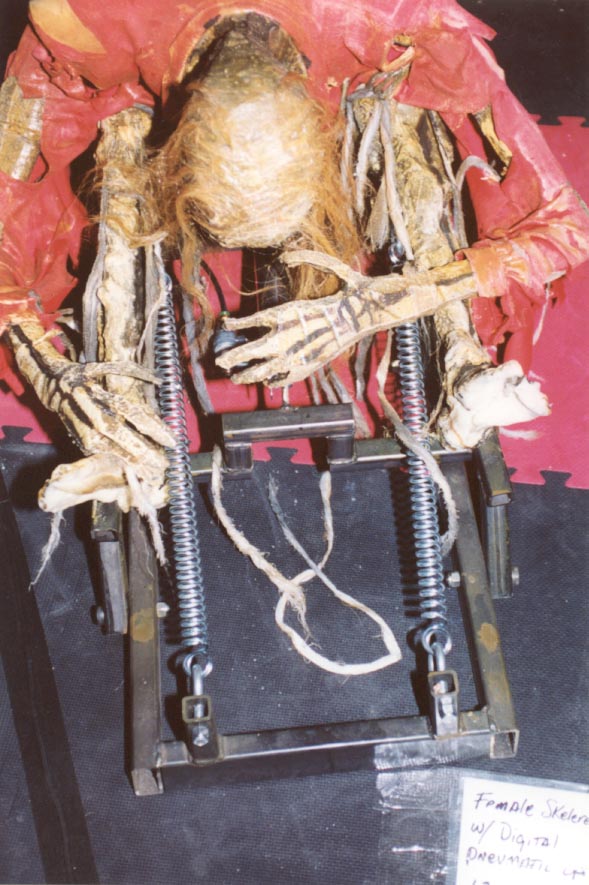
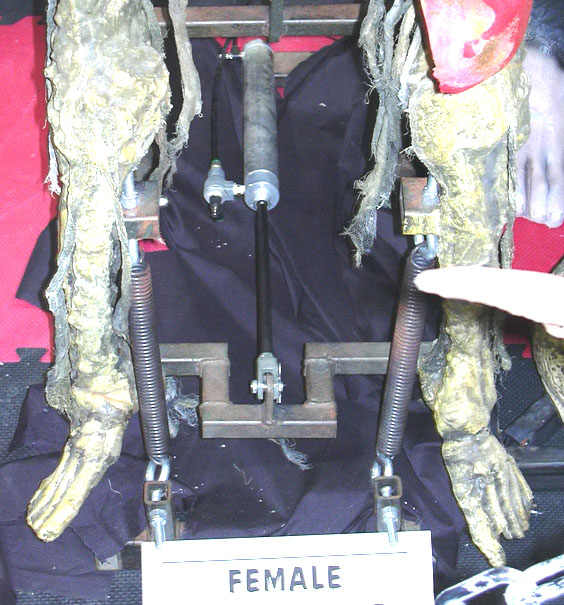
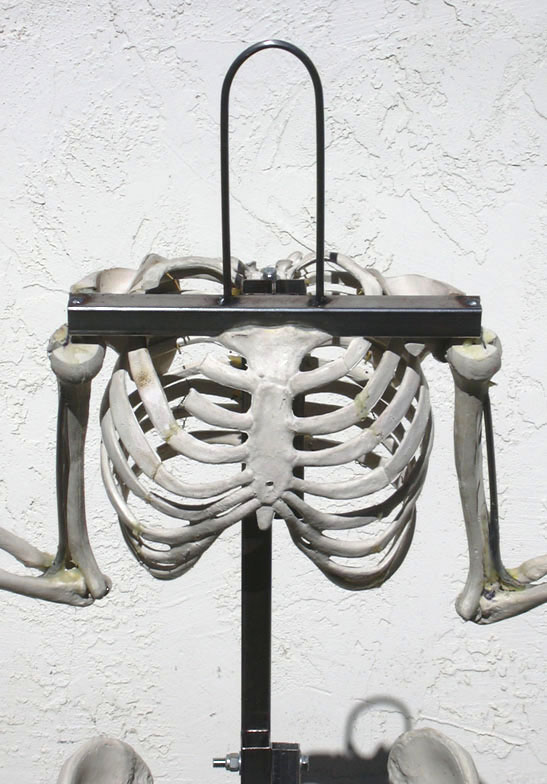
The Erector was constructed from 1" x 1" and 1" x 2" steel tubing. The steel tubing was welded using a MIG welder. The four-bar linkage pivoted on 3/8" bolts with washers and locknuts. Obviously, the ribcage, arms and legs came from a Bucky skeleton. The use of a Bucky skeleton in this type of application would typically be discouraged. However, I think that if you look at the various construction photographs, you'll see that great care was taken to secure the Bucky bones to the steel armature. Channels were cut into the bones in order to "wrap" the bones around the steel tubing. The bones were secured to the steel tubing using 1/4" bolts with washers and locknuts. The Bucky bones are very well secured.
Here's a shot of the Erector (without its head) in the collapsed position. Actually, in this position, the Erector is a bit over-extended. At this point, I have yet to incorporate the 2" bore, 10" stroke cylinder. I have incorporated one spring.
The ribcage folds up between the legs. This is the reason why the hipbones are so far apart.
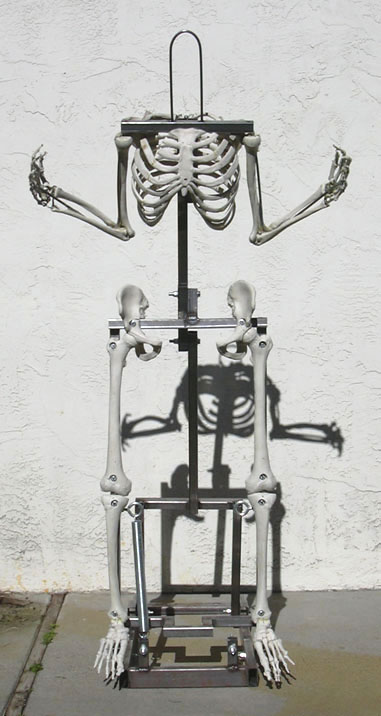
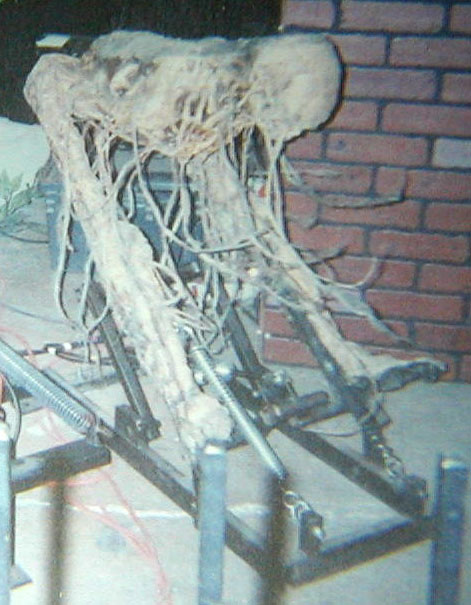
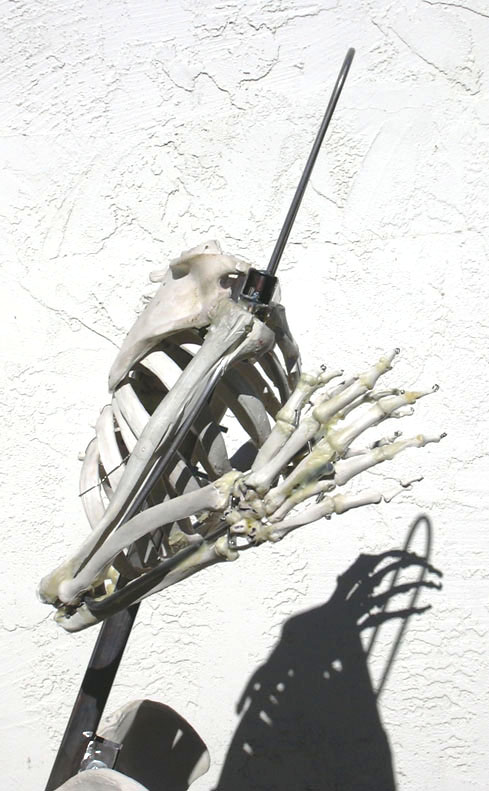
Here's a close-up of the Erector's head and shoulders. I used 1/4" steel rod to reinforce the head/neck and arms. The steel rods run through 1/4" holes in the 1" x 1" steel tubing which forms the shoulders and are welded in place. You can see the cream-colored (yellow) Devcon High Strength Plastic Welder that I used to reinforce the Bucky arms.
Note: Devcon Plastic Welder works GREAT in conjunction with Bucky bones.
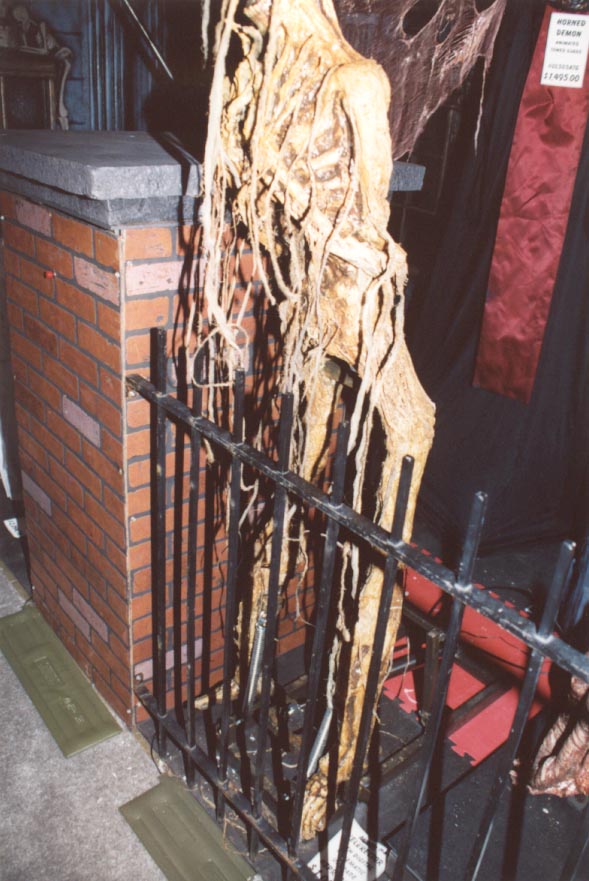
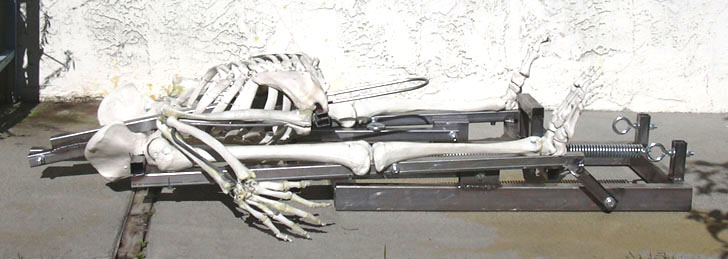
Here's a shot of the Erector from the side.

I used Plastic Welder to secure all of the individual bones of each hand.
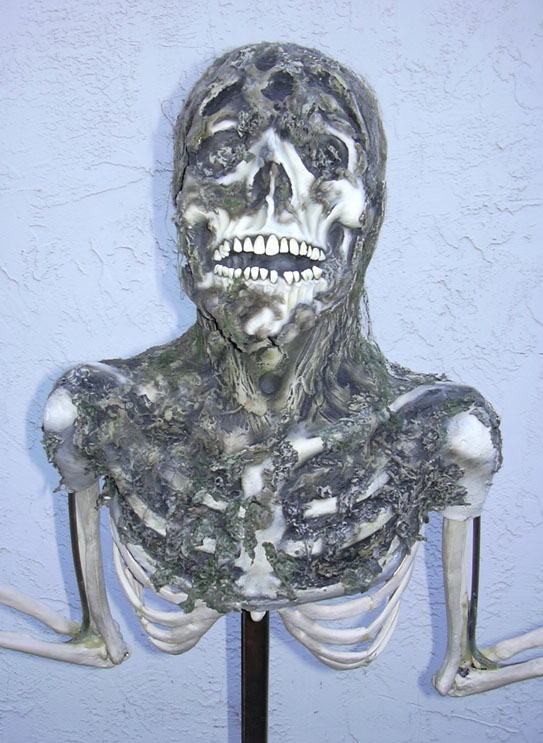
For the head, I used a Death Studio's Tom Savini Deluxe Nate latex bust. I stuffed Nate with newspaper, covered him with Syran Wrap and formed a two-piece mother-mold using plaster bandage. I removed the newspaper stuffing from Nate and I removed Nate from the mother-mold.
I pulled Nate down over Bucky's arms and ribcage. I secured Nate to the lower ribs of the ribcage and the shoulder blades using Devcon Grip-ton-ite Flex Super Glue.
Note: Devcon Flex Super Glue works GREAT in adhering a latex bust to Bucky bones. It sets up in seconds.
With Nate secured to the ribcage, I repositioned the two-piece mother mold around the bust. I inverted the assembly and foam-filled the head with BJB TC-265 soft urethane foam.
Note: I used an electric mixer in order to mix the BJB TC-265 for the first time and it worked GREAT.
Here's a shot of Nate secured to the Bucky ribcage and arms. Make sure that you click on the hyperlink in order to see the detail in the Death Studio's Deluxe Nate.
Here's a shot of Nate from the back. Nate doesn't have a bad side. Notice how well Nate's shoulder blades align with Bucky's.

Of course, the whole Erector will be corpsed using cotton and latex and airbrushed to match the Deluxe Nate bust.
I hope to incorporate the 2" bore, 10" stroke double-acting cylinder within the next week or two.
Conclusions
I think that the construction of the Erector is very close to the construction of the Scarefactory's Skelerector. The spring that I'm using it too long. I may try to incorporate a pair of shorter springs to see if they can adequately erect the Erector without the aid of a pneumatic cylinder. Ultimately, I plan to use a double-acting cylinder in order to erect AND retract the Erector. I spoke with a fellow haunter who owns an automated Skelerector which uses a double-acting cylinder (with one port used as an exhaust). He eventually plumbed both ports to a five-port, two-position solenoid valve. He stated that the performance was greatly improved. Of course, this is likely at the expense of safety which is, I believe, the Scarefactory's main motivation in using springs. If you or anyone you know owns or has access to a Skelerector, I'd love to understand how close I came to the original.